What Should You Do Before Setting Up your Antminer S21 XP?
Antminer S21 XP: The Ultimate Bitcoin Mining Rig – 270 TH/s Hash Rate & 13.5 J/TH Efficiency
The Antminer S21 XP (270Th) is Bitmain’s latest air-cooled Bitcoin miner, designed to deliver unmatched efficiency and performance in the competitive world of cryptocurrency mining. With an insane hashrate of 270Th/s and a power consumption of just 3650W, this miner sets a new standard for SHA-256 algorithm mining.
If you’re looking for the most efficient Bitcoin mining hardware, the Antminer S21 XP should be at the top of your list.
Before mining with your Antminer S21 XP, follow this inspection guide to ensure safety and optimal performance.

Antminer S21 XP Setup Guide – Unboxing & Preparation Checklist
| Step | Details |
|---|---|
| 1. Unboxing & Inspection | Carefully unbox the Antminer S21 XP and check for shipping damage. Verify all included components: miner unit and user manual. Missing parts may affect your mining setup. |
| 2. Power Supply Setup | Use a high-efficiency mining PSU (e.g., APW17 or compatible) with stable 220V power input. Ensure power cables are securely connected to avoid voltage drops. |
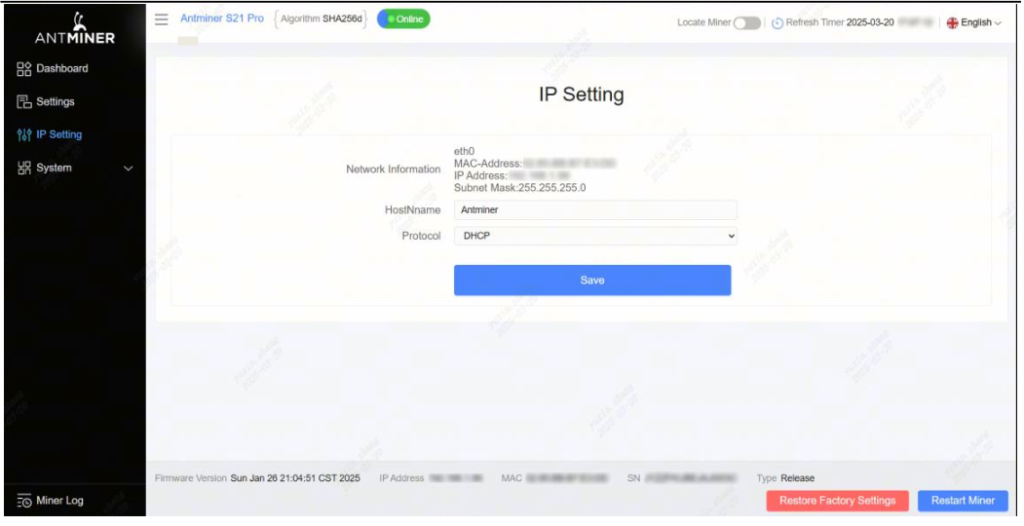
| 3. Network Configuration | Connect the Antminer S21 XP via a reliable Ethernet cable (Cat5e or higher) to your router or switch. For stable mining, consider assigning a static IP address. |
| 4. Cooling & Environment | Place the miner in a well-ventilated area with ambient temperature between 10–35°C (50–95°F). Proper airflow prevents overheating and extends hardware lifespan. |
| 5. Safety Precautions | Ground the Bitmain Antminer to prevent static damage. Use a surge protector and avoid humid environments to protect your ASIC mining hardware. |
| 6. Required Tools | An IP scanner tool, and a multimeter (for voltage checks) ready before starting the setup process. |

How to Set Up Your Antminer S21 XP for Mining?
The S21 XP server is Bitmain’s newest version in the 21 server series. Power supply APW171215 is part of S21 XP server. All S21 XP servers are tested and configured prior to shipping to ensure easy set up.
NOTE:
(1) Power supply APW171215 is part of S21 XP server.
(2) One ANTWIRE‐20SP power cord is needed and should be connected to PDU.

Caution:
1.Please refer to the layout above to place your goodsin usage in case of any damage.
2.The equipment must be connected to an earthed mains socket‐outlet. The socket‐outletshall be installed near the equipment and shall be easily accessible.
3.The equipment hastwo power inputs, only by connecting those two power supply sockets simultaneously can the equipment run. When the equipment is powered off, be sure to power off all power inputs.
4.DO NOT remove any screws and cables tied on the product.
5.DONOT PRESS the metal button on the cover.
6.Please note that the actualservershall prevail


Setting up the Miner
| Step | Action | Details |
|---|---|---|
| 1 | Go to the official website | Visit: BITMAIN firmware download link Select “Others” on the left, then “IP reporter” on the right. |
| 2 | Download the file | Download: IPReporter.zip |
| 3 | Extract the file | Unzip the downloaded file. |
| 4 | Run IPReporter.exe as Administrator | Right-click IPReporter.exe and select “Run as Administrator.” |
| 5 | Select an option | Choose one: – Shelf, Step, Position (for farm servers) – Default (for home servers) |
| 6 | Start the process | Click “Start.” |
| 7 | Press the IP Report button | On the control panel, press and hold the IP Report button until it beeps (~5 seconds). The IP address will appear on your computer screen. |
| 8 | Enter the IP in a browser | Type the displayed IP address into your web browser. |
| 9 | Log in | Username: root Password: root |
| 10 (Optional) | Assign a Static IP | In the Protocol section, configure: – IP Address – Subnet Mask – Gateway – DNS Server |
| 11 | Enter network details | Fill in the required network settings. |
| 12 | Save settings | Click “Save.” |
| 13 | Learn more | For gateway & DNS help: BITMAIN Support Article |


Configuring the Miner
Setting up the Pool
Click Settings >Set the options according to the following table>Click Save after the configuration
| Option | Description |
|---|---|
| Mining address | Enter the address of your desired pool. The S21 XP. servers support three mining pools, with priority order: – Pool 1 (highest priority) – Pool 2 (used if Pool 1 is offline) – Pool 3 (used if Pools 1 & 2 are offline). |
| Name | Your worker ID on the selected pool. |
| Password (optional) | The password for your selected worker (if required by the pool). |
2.There are two working modes of S21 XP server: Normal mode and Sleep mode. The server enters the sleep mode under the condition that the control board is powered while hashboards are not powered.

Monitoring Your Miner
To check the operating status of your server (taking S21 XP 270T as an example):
Click dashboard marked below to check the server status.

Monitor your server according to the descriptionsin the following table
| Option | Description |
|---|---|
| Number of chips | Number of chips detected in the chain. |
| Frequency | ASIC frequency setting. |
| Real Hashrate | Real-time hashrate of each hash board (GH/s). |
| Inlet Temp | Temperature of the inlet (°C). |
| Outlet Temp | Temperature of the outlet (°C). |
| Chip state | Status indicators: ● Green Icon – Normal operation ● Red Icon – Abnormal condition |
Administering Your S21 XP Miner
1 Checking S21 XP Firmware Version
| Step | Action | Details |
|---|---|---|
| 1 | Enter server backstage | Locate the firmware version at the bottom of the page. |
| 2 | Check File System Version | Displays the firmware date (e.g., 20240608). |

2 Upgrading S21 XP System
| Step | Action | Details |
|---|---|---|
| 1 | Go to System > Firmware Upgrade | Click to open the upgrade interface. |
| 2 | Keep Settings option | – ✔ Keep settings (retains current configurations, default) – ✖ Unselect (resets to factory defaults) |
| 3 | Upload & update | Select the upgrade file and click Update. |
| 4 | Post-upgrade restart | After completion, the server reboots to the settings page. |
| 5 | Choose action | – Reboot: Applies new firmware immediately. – Go Back: Continues mining; new firmware loads on next restart. |
fails before the upgrade is completed, you will need to return it to BITMAIN for repair

3 Modifying Your Password
| Step | Action | Details |
|---|---|---|
| 1 | Navigate to System > Password | Open the password settings tab. |
| 2 | Set new password | Enter the new password and click Save. |

4 Restoring Initial Settings
| Step | Action | Details |
|---|---|---|
| 1 | Power on & wait | Let the server run for 5 minutes. |
| 2 | Hard reset | Press and hold the Reset button for 10 seconds. |
Antminer S21 XP Environmental Requirements
| Description | Requirement |
|---|---|
| Operating Temperature | -20°C to 45°C |
| Operating Humidity | 10% to 90% RH (non-condensing) |
| Storage Temperature | -20°C to 70°C |
| Storage Humidity | 10% to 90% RH (non-condensing) |
| Maximum Altitude | <2000 meters |
| Pollution Level | Example Sources | Minimum Distance Requirement | Additional Notes |
|---|---|---|---|
| Heavy Pollution | Smelters, Coal Mines | >5 km | – |
| Moderate Pollution | Chemical Plants, Rubber Factories, Electroplating Industries | >3.7 km | – |
| Light Pollution | Food Processing Plants, Leather Tanneries | >2 km | If unavoidable, choose upwind location |
| Coastal Areas | Seaside, Saltwater Lakes | Avoid within 3.7 km | If unavoidable, ensure airtight structure with AC cooling |
Electromagnetic Environmental Conditions
Please keep your site away from transformers, high-voltage cables, transmission lines,and high-current equipment. For example, there should be no high-power AC transformers (>10KA) within 20 meters, and no high-voltage power lines within 50 meters. Additionally, keep your site away from high-power radio transmitters; for example, there should be no high-power radio transmitters (>1500W) within 100 meters.
How to Troubleshoot Common Issues with the Antminer S21 XP?
Bitmain Miner Troubleshooting Guide: Fix Common Issues Quickly
Is your Bitmain miner experiencing problems? Follow this step-by-step troubleshooting guide to resolve network, power, and startup issues efficiently.

1. Unable to Connect to the Network (Detailed Solutions)
Network Connection Problems
If your Antminer S21 XP isn’t connecting to the network, follow these steps:
Step-by-Step Fixes:
- Physical Connection Check
- Inspect Ethernet cables for damage
- Try a different network cable (Cat5e or better recommended)
- Test with another router/switch port
- Network Configuration
- Verify miner IP address (check DHCP or static IP settings)
- Ensure no IP conflicts on your local network
- Test with different DNS settings (try Google’s 8.8.8.8)
- Advanced Troubleshooting
- Ping test from another computer
- Check router firewall settings
- Update miner firmware if available
Pro Tip: Always keep a spare network cable and test with different network hardware when diagnosing connection issues.
2. Abnormal Mining Power (Performance Troubleshooting)
Diagnosing Hashrate Problems
When your S21 XP shows abnormal mining power:
Comprehensive Checks:
- Pool Configuration
- Verify pool URL and port (e.g., stratum+tcp://pool.btc.com:3333)
- Check worker credentials and password
- Test with alternative mining pools
- Hardware Monitoring
- Check individual hashboard status
- Monitor chip error rates in dashboard
- Verify power supply voltage stability
- Environmental Factors
- Maintain ambient temperature below 35°C
- Ensure proper ventilation and airflow
- Clean dust from fans and heatsinks regularly
Maintenance Recommendation: Schedule weekly cleaning and monthly full hardware inspections for optimal performance.
3. Miner Cannot Be Turned On (Power Issues Resolution)
Complete Power Failure Diagnosis
If your Antminer won’t power on:
Systematic Approach:
- Power Supply Verification
- Test PSU with another device if possible
- Check voltage output with multimeter
- Verify all power cables are securely connected
- Circuit Testing
- Try different power outlets
- Check circuit breaker status
- Test with alternative power cables
- Hardware Inspection
- Look for burnt components or unusual smells
- Check for loose connections inside the miner
- Inspect power input ports for damage
Safety Note: Always disconnect power before inspecting internal components and use proper anti-static precautions.
What Information Should You Prepare for Customer Support?
When contacting support, having the right information can speed up the process.
Prepare your miner’s model, serial number, a description of the issue, and any relevant logs or error messages.

If your Bitmain Antminer S21 XP is experiencing problems, providing detailed information helps support teams diagnose and resolve issues faster. Below is a structured guide on what details to include when reporting a fault.
1. Miner Model and Serial Number
What to Provide:
- Correct Model: Antminer S21 XP (confirm it’s not S19 or another variant)
- Serial Number: Found on the miner’s label (e.g., S21XP2024XXXXXXX)
2. Fault Description
What to Include:
- Failure to Start: Does the miner power on but not hash? Any beeps or LED error codes?
- Connection Issues: Can you access the miner’s dashboard? Does it disconnect frequently?
- Performance Problems: Are hashboards reporting errors? Is fan speed abnormal?
3. Operation Log & Error Information
How to Retrieve Logs:
- Access the miner’s web dashboard
- Navigate to System > Current Logs (and histroy Logs)
- Download and share the logs
4. Miner Dashboard Screenshot
What to Capture:
- Full dashboard (including all hashboards)
- System Info tab (firmware version, uptime)
- Pool status & rejected shares
5. Mining Pool Information
What to Verify:
- Pool URL & Port (e.g., *stratum+tcp://btc.f2pool.com:3333*)
- Worker Name (must match your mining account)
Final Checklist Before Contacting Support
Before submitting a support ticket, ensure you provide:
- Model & Serial Number
- Detailed Fault Description
- Operation Logs
- Dashboard Screenshot
- Mining Pool Settings
What Is the Repair Process for the Antminer S21 XP?

Bitmain Antminer S21 XP Warranty & Repair Process: Complete Step-by-Step Guide
1. Contacting Bitmain Customer Support
When to Contact Support:
- If troubleshooting fails to resolve hardware issues
- When experiencing persistent performance problems
- For warranty claims on defective units
Best Ways to Reach Support:
- Official Support Portal (Recommended)
- Visit BITMAIN’s Official Support Page-bottom right corn-online chat
- https://support.bitmain.com/hc/en-us/requests/new
- Call: +1(717)502-4531
- Include detailed fault description and evidence
2. Fault Verification Process
Standard Diagnostic Procedure:
- Initial Assessment
- Support will request:
- Device model and serial number
- Firmware version
- Mining pool configuration
- Error logs and screenshots
- Support will request:
- Remote Diagnostics
- May request access to your miner dashboard
- Could ask for specific diagnostic tests
- Troubleshooting Steps
- You may be asked to:
- Try different power supplies
- Test with alternative firmware
- Check specific hardware components
- You may be asked to:
Common Resolution Paths:
- Software issues: 70% resolved remotely
- Hardware problems: 30% require repair service
3. Preparing Your Miner for Return
Pre-Shipment Checklist:
✓ Backup your miner configuration
✓ Perform factory reset (if instructed)
✓ Clean the device of dust/debris
✓ Take photos of device condition
Packaging Guidelines:
- Use original packaging if available
- Add sufficient cushioning material
- Include all accessories/cables
- Seal with heavy-duty tape
Shipping Instructions:
- Print provided shipping label
- Choose tracked/insured shipping
- Keep tracking number for reference
4. Repair & Testing Phase
Standard Repair Timeline:
- Receipt confirmation: 1-2 business days
- Diagnosis: 3-5 business days
- Repair: 5-10 business days
- Testing: 2-3 business days
What Happens During Repair:
- Component-Level Diagnosis
- Hashboard testing
- Control board inspection
- Power supply verification
- Repair Process
- Chip replacement if needed
- Firmware reflashing
- Thermal paste reapplication
- Quality Assurance
- 48-hour burn-in test
- Performance benchmarking
- Final inspection
5. Receiving Your Repaired Miner
Post-Repair Process:
- Shipment Notification
- You’ll receive tracking information
- Typical delivery time: 3-7 business days
- Receiving Checklist
- Inspect package for damage
- Verify all components are returned
- Check for repair documentation
- Reinstallation Guide
- Recommended first steps:
- Update to latest firmware
- Monitor closely for 24 hours
- Gradually increase workload
- Recommended first steps:
Warranty After Repair:
- 15-day warranty on repaired components
- Original warranty remains valid if unexpired
Pro Tip: Always maintain proper maintenance records and consider extended warranty options for high-value mining equipment.
Conclusion
Get the most out of your Antminer S21 XP with simple yet effective strategies for better performance, smoother maintenance, and longer hardware life. This guide helps you mine smarter—maximizing efficiency and returns without the hassle.
No more guesswork—discover easy, pro-level tweaks to keep your miner running at its best.
Want to learn more about the Antminer S21 XP? Please click to get more help.


