
What Should You Do Before Setting Up Iceriver AE1 LITE?
The IceRiver AE1 Lite ASIC Miner is a powerful and energy-efficient solution for mining zkSNARK-based cryptocurrencies like ALEO. With a 300Mh/s hash rate and only 500W power consumption, it offers an impressive 1.667J/Mh efficiency, making it ideal for professional miners.
If you’ve just acquired an AE1 Lite, this guide will walk you through the setup process, optimization tips, and best practices to maximize your mining performance.

Unboxing & Initial Inspection
Before setting up your IceRiver AE1 Lite, ensure all components are included:
- AE1 Lite ASIC Miner
- Ethernet cable (for network connection,Prepare yourself)
- User manual
Check for any physical damage during shipping and verify all parts are present.
Precaution
1 Check for physical interference causing damage to the machine and beware of electric shock.
2 Ensure cable connections are firm before powering on, and observe electrical safety.
3 Keep hash boards and other components away from water or moisture.
4 Maintain ambient temperature between 0–40°C.
5 Operate machines in environments below 2000 meters in altitude.
6 Ensure proper air convection in the operating environment.
7 Avoid covering the machine surface due to high operating temperatures.
8 Do not place flammable or explosive materials near the machine during operation.
9 Maintain environmental humidity below 90%.
10 Keep the environment clean to prevent dust, hair, or other foreign objects from entering and damaging the machine.
11 Use a stable voltage supply.
12 Place the machine horizontally for proper operation.
13 Damage due to improper environment (e.g., crushed/burned hash boards) is not covered by warranty.
14 Customers must not disassemble the machine without permission from ICERIVER after-sales team.
Preliminary inspection of the machine before operation:
Check the appearance of the package for deformation.
Check the appearance of the machine for deformation and breakage. Also check the fan and cable.
Check if there is any strange sound in the machine and observe if the heat sink is off.
Note: Please do not disassemble the machine by yourself. The machine will not be covered by
the warranty if the user disassembles the machine without permission.
How to Set Up Your Iceriver AE1 LITE for Mining?


Please connect the machine to the Ethernet first, and then plug in the power cord. During the
startup process, the red and green status lights will be constantly on. After approximately 1 minute,
the green status light will start blinking, indicating that the miner has successfully started.
Access Machine
Obtain Machine IP
Getting your AE1 LITE connected to your network is crucial for mining operations. Follow this optimized guide to easily locate and configure your miner’s IP address.
1.Obtain the IP address of the machine through download and unzip the batch processing tool
provided by our company (please refer to the Iceriver website to download:
2.Click the [IP Reporter] button and long press the machine’s button for 1-2s after the pop-up
window to get the machine IP.

Access Machine
1.Open your web browser (Chrome browser is recommended) and enter the machine’s IP address in the address bar. You will see the following interface.
2.Use the default username “admin” and the default login password “12345678” to log in to the machine.

Language Switch
Click [Language] in the upper right corner of the page to switch between Chinese or English.

Change Password
To protect your property security, please change the miner password after the first time you turn on the machine.
1.Click [User Settings], enter the current password and the new password as shown below, and click the [Save] button.
2.After the password change is completed, you need to log in again with the new password.

Configuring mining pools and wallets
Address
1.Go to the [Mining Setting] page and find [Pool Configuration].
You can configure three mining pools with the following reference example:
Pool 1:stratum+tcp://aleo.us1.whalepool.com:42343
Wallet/Worker:

The password is optional and can be set or not, it does not affect mining.
2.Click Save and a configuration success window will pop up.
3.After successful configuration, click [Reboot] and wait for the machine to reboot (do not power off during the reboot process).
4.The information on the home page shows that the pool is ” connected “, which means the pool is successfully connected.

*The default pool configuration is the configuration of our company when testing, please configure your own mining wallet address before you start mining, please do not use the default configuration.
*If pool 1 is not connected, the machine will automatically connect to pool 2. If pool 2 is not connected, the machine will automatically connect to pool 3.
- If the configuration fails you can configure it again and restart it.

- The above mining pool information is the mining pool address we used for testing purposes.
Before connecting to the mining pool, please log in to the respective mining pool’s official website
and check if the mining pool address has changed.
Remove
Clear the information in [Pool Configuration] and click [Save] to remove the mining pool.
Adjusting fan speed
1.Find [Hardware Configuration] in [Mining Setting].
2.Check [Fan Speed].
3.Select the fan mode, or manually adjust the speed, click [Save] after modification.

- After power on, the fan will start only after successfully connecting to the mining pool and
mining program starts, and the fan speed is full speed by default. - The machine will stop mining in sleep mode.
- After manually changing the fan speed, the fan speed in [Hardware Configuration] will still
show 100%.
View Hashrate Chart
Click [Home] to view the Hashrate Chart.
- After 5 minutes of connecting to the pool, you can view the machine’s hashrate and hashrate
chart, the chart is updated every 5 minutes. - Under Hash board, you can view the machine temperature and fan speed, which can monitor the
working status of the machine in real time.


Network Settings
The factory default is DHCP mode, users can set the IP mode according to their needs.
Set static IP:
- Click [IP Settings], select Static in [Protocol], fill in the IP information according to the user,
and then click [Save] button. - After saving the configuration, click [Reboot] and wait for the machine to reboot (do not power
off during the reboot).

Firmware Upgrade
When the official website releases a new upgrade package, download it and upgrade it via Web.
1.Click [Firmware Upgrade], select the official upgrade package and click [Upgrade].
2.Wait for the pop-up window to show success and then click [Reboot] and wait for the machine to reboot (do not power off during the reboot process).
3.After reboot, the firmware upgrade is successful.

Factory Reset
When the machine has abnormal conditions, you can restore the factory settings through the
Button on the machine.
1.After the green status light starts blinking following the power-up (1 minute after power on),
press and hold Button for 20 seconds until the red status light starts blinking. Waiting until the red status light stops blinking and wait for the machine to reboot (do not power off the machine during the reboot process).
2.After the machine reboot, reconfigure the mining pool and wallet to resume mining.
Shutdown/Reboot
Shutdown-Turn off the machine via the miner power button.
Reboot-Click [Reboot] in the bottom right corner of the home page, then click [OK] to confirm, then
reboot the machine.
Note: Do not power off the machine during the reboot process.

Viewing Miner Logs
Miner logs are an important tool for recording the operating status of your device. They help users
monitor performance, quickly identify faults, and analyze root causes. After logging into the miner,
click on the “Miner Log” option in the backend to view the log content.
Miner logs record operational data of the miner and are used for:
Monitoring the miner’s status (such as hashrate, temperature, fan speed).
Diagnosing common faults (such as network disconnections or hashboard errors).
Providing historical data to trace the root cause of issues, making maintenance and
optimization easier.
1.Current Logs: These logs record the miner’s operational status since its last startup. They are
useful for troubleshooting issues that occurred without a reboot.
2.History Logs: These contain long-term operational data. The file size is fixed, and older logs are
overwritten by new ones. After a reboot, historical logs can be used to analyze the cause of faults.

How to Download Logs
- Download Current Logs: Saves the complete logs of the current session.
- Download History Logs: Saves all historical log records for future analysis.

How to Troubleshoot Common Issues with the Iceriver AE1 LITE?
Encountering issues? Here’s how to diagnose and fix common problems.
Common issues include network connectivity, abnormal hash rates, and power failures, which can often be resolved with simple checks.

Is your AE1 LITE slower than expected—or not working at all? Follow this step-by-step guide to diagnose and resolve common issues, ensuring peak mining efficiency.
Power Supply Issues
❌ Red & green status lights do not light up
✅ Solution:
- Check if the power connector is loose or disconnected.
- Ensure the power cord is securely inserted.
Network Connection Problems
❌ Network port light does not light up
✅ Solution:
- Verify that the Ethernet cable is properly plugged in.
Fan Malfunction
❌ Fans do not spin after powering on
✅ Solution:
- Check if the mining pool connection is successful.
High Temperature Warning
❌ Machine temperature is too high
✅ Solution:
- Ensure the machine is not covered or obstructed.
- Place the miner in a well-ventilated area with proper air circulation.
Low Hashrate Issues
❌ Hashrate does not meet the target
✅ Solution:
- Check if the machine’s surface temperature is too high (high temps trigger performance throttling).
- Improve cooling with better airflow or external fans.
- Short-term fluctuations are normal—monitor the 12-hour average hashrate.
❌ Large difference between Web hashrate & mining pool hashrate
✅ Solution:
- Verify that the network connection is stable.
Web Interface Access Error
❌ Browser shows “404” when entering the machine’s IP
✅ Solution:
- Reboot the miner and try accessing the web interface again.
Red & Green Lights Blinking Simultaneously
Possible Causes:
- High Temperature Warning – Internal temperature exceeds safe limits (poor ventilation, high ambient heat).
- Network Issue – Unstable connection, incorrect mining pool settings.
- Low Temperature Anomaly – Machine is too cold (due to extreme ambient temps or excessive cooling).
Troubleshooting Steps:
- Check Machine Temperature:
- Ensure proper ventilation & avoid blocked airflow.
- Move to a cooler environment if overheating.
- Verify Network Stability:
- Confirm stable internet & correct mining pool configuration.
- Check for Excessive Cooling:
- If using external fans, ensure they are not overcooling the miner.
Final Tips for Optimal Performance
✔ Maintain proper airflow around the miner.
✔ Monitor 12-hour average hashrate for accurate performance tracking.
✔ Ensure stable power & network connections to avoid disruptions.
🚀 Need More Help? Click here for more helpful resources and support!
What Information Should You Prepare for Customer Support?
When contacting support, having the right information can speed up the process.
Prepare your miner’s model, serial number, a description of the issue, and any relevant logs or error messages.

🚀 Need expert help with your AE1 LITE? Providing the right details ensures quick, accurate solutions—whether you’re facing connectivity issues, low hashrate, or hardware failures. Follow this structured guide to speed up support and avoid warranty delays.
📋 Required Information for AE1 LITE Support
1️⃣ 🔍 Device Identification (Mandatory)
✔ Full Model Number (e.g., Iceriver AE1 LITE )
✔ Serial Number (Check back/bottom label)
✔ Firmware Version (Go to Settings > System Info)
2️⃣ ⚠️ Problem Description (Be Specific!)
✔ Exact Symptoms (No power? Low hashrate? Pool disconnects?)
✔ Error Codes/Logs (Screenshot any warnings)
✔ When It Started (Date, frequency, recent changes)
✔ Device Behavior (Crashes, overheating, sudden shutdowns)
3️⃣ 📊 Diagnostic Data (Critical for Analysis)
✔ System Logs (Last 24 hours preferred)
✔ Screenshots of:
- Miner dashboard (full interface)
- Temperature & power stats
- Error messages (if any)
4️⃣ ⛏️ Mining Configuration Details
✔ Pool Settings:
- Stratum URL
- Worker Name & Password
- Difficulty Settings (If customized)
✔ Network Setup (Diagram if using switches/advanced configs)
5️⃣ 🎥 Additional Evidence (Speeds Up Fixes)
✔ Video of the Issue (Highly recommended for hardware problems)
✔ Maintenance History (Past repairs, firmware updates)
✔ Environment Conditions:
- Room temperature & humidity
- Cooling system status (fans, airflow)
🔑 Why This Matters for Warranty & Faster Support
✅ Reduces Response Time – Complete info = quicker diagnosis
✅ Prevents Warranty Denial – Missing details can delay repairs
✅ Ensures Long-Term Fixes – Helps identify root causes
What is the Repair Process for the Iceriver AE1 LITE?
If your miner needs repair, here’s what to expect.
Contact support, provide necessary details, and follow their instructions to send the device for repair.
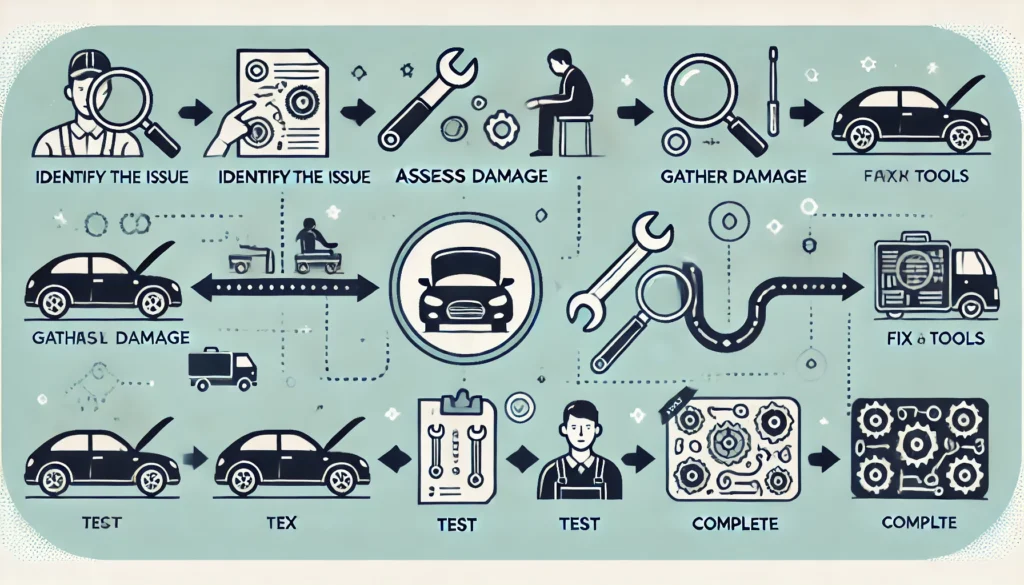
🔧AE1 LITE Repair Service – Streamlined Process for Expert Care
Ensure your AE1 LITE receives professional attention with our efficient repair service. Follow these steps for a seamless experience—from initial request to device return.
🔧 AE1 LITE Repair Process
1️⃣ Request Service
Initiate your repair by submitting a request through:
- Support Portal
- Email Support :service@iceriver.io
2️⃣ Diagnostic Assessment
To expedite troubleshooting, provide:
- Device Identification (Model & Serial Number)
- Error Documentation (Logs, screenshots, or video evidence)
- Mining Configuration Details
Our team will conduct a preliminary fault analysis.
3️⃣ Return Authorization & Shipping
- Receive an RMA Number (required for returns)
- Follow secure packaging guidelines to prevent transit damage
- Ship via approved carriers (tracking information mandatory)
4️⃣ Professional Repair & Testing
Our service center performs:
- Comprehensive diagnostics (hardware & software evaluation)
- Precision repairs/replacements (using genuine OEM parts)
- Latest firmware updates (optimizing device performance)
5️⃣ Return & Verification
- QA-certified after rigorous post-repair testing
- Tracked return shipping (with delivery confirmation)
- Optional on-site reintegration support (available upon request)
🌟 Benefits of Choosing Official Repair Service
✔ Expedited Service – Minimized downtime with efficient processing
✔ Authentic Components – OEM parts for reliable performance
✔ Warranty Compliance – Protects your device coverage
✔ Certified Technicians – Expert handling by trained professionals
Conclusion
The IceRiver AE1 Lite is a high-performance miner for zkSNARK-based cryptocurrencies, offering exceptional efficiency. By following this guide, you can set up, optimize, and maintain your miner for maximum profitability.
Click here for more helpful resources and support!
Happy mining! ⛏️💰
